Relayer
Requirements
- A Linux machine
- A MongoDB Cluster
- Access to registry.parfin.io
- A Rayls Privacy Ledger
- A Commit Chain
- The smart contracts already deployed in the Private Ledgers and Commit Chain
Deploy the required contracts
Rayls Relayer requires some contracts, which can be deployed using a container that is available in our registry.
In order to do so, run the container providing the required environment variables and the correct entrypoint is the enough to deploy the contracts and receive the output to fill the configuration json (described below).
In this container we have two scripts:
- To deploy the required contracts at the commit-chain (this is only required when deploy a VEN)
- To deploy the contracts at the Rayls Privacy Ledger
Deploy the contracts at the commit chain
The command below can be utilised to deploy the contracts at the commit chain.
sudo docker run --env rpcURL=http://commitchain-address:8545 --env chainID=00001 --env privateKey=privatekey --entrypoint "/app/deploy_cc.sh" registry.parfin.io/rayls-contracts:v1.7.0Here, we pass three variables calling the /app/deploy_cc.sh in the entrypoint:
- rpcURL: The RPC address of the commit chain
- chainID: The chainID of the commit chain
- privateKey: The Private Key of the VEN operator
Deploy the contracts in a Rayls Privacy Ledger
The command to deploy the contracts in a Rayls Privacy Ledger is very similar, follow:
sudo docker run --env rpcURL=http://parfin-privacy-ledger-01.api.blockchain-sandbox.parfin.aws:80 --env chainID=80001 --env privateKey=001020af1b1d1d4ee4902d4591855b0d3a1e4ab9e77899ce662c20ba8ca95c73 --env balanceAddress=0xa4f7EE68a1c1222A6db6768A5CF78dc58950a36e --entrypoint "/app/deploy_pl.sh" registry.parfin.io/rayls-contracts:v1.7.0Here, we provide four variables as input, calling the /app/deploy_pl.sh script as the entrypoint:
- rpcURL: The RPC address of the Rayls Privacy Ledger where the contracts will be deployed
- chainID: The chainID of the Privacy Ledger
- privateKey: The Private Key of the Privacy Ledger (if it is the first deploy and you do not have, is possible to generate one at https://vanity-eth.tk/
- balanceAddress: The balance Address, that was generated in the step before, where we deployed the commit chain contracts.
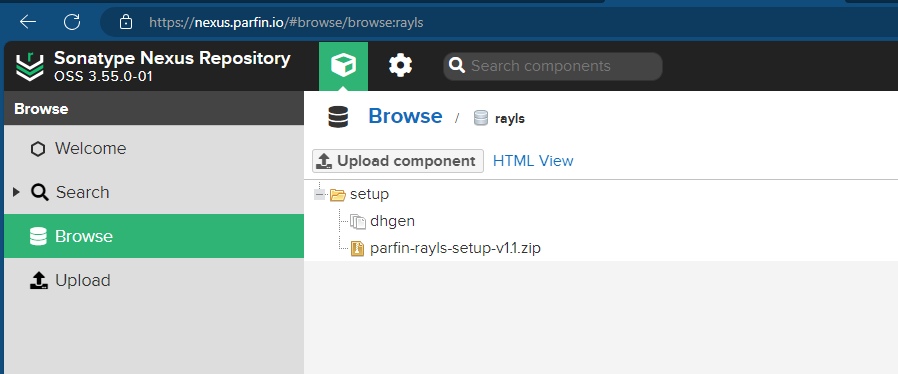
Generate the DhSecret and DhPublic
In order to facilitate the process for the generation of the DhSecret and DhPublic, we've created a binary called dhgen that can be downloaded from nexus.parfin.io:
This binary generates different key pair every time that we run:
$ ./dhgen
SECRET KEY: 3e3fd24e3e2d41be2dc45202d1c24ded2d01ce2bebeb2202e4f352f5bb231c0bf4ce32ec11
PUBLIC KEY: de7ed91140372465d25bd636e5aa7a91dda46d108905d36ea6335820bbad750428eded40a4bc01b534b211c79ce1c3905d42539e2485ca6b4a7d0a43dd39725d
Successfully created keys
Adjust the configuration file
Once the smart contracts are deployed in the Commit Chain and Private Ledger, the configuration JSON file must be filled with the required information of the environment.
{
  "Database": {
    "ConnectionString": The connection string for mongoDb,
    "Name": The name of the database,
    "Type": "mongodb"
  },
  "Blockchain": {
    "ChainID": chainId of your connected network,
    "ChainURL": URL of your connected network,
    "ChainWSURL": websocket URL of your connected network,
    "SignatureStorageAddress": the SignatureStorageAddress for each PL. Take it from the values we generated earlier,
    "EndpointAddress": the Entrypoint for each PL, generated earlier
    "BatchSize": The batch size of the transactions,
    "StartingBlock": The block where the Relayer will start to process transactions,
    "DhSecret": The Diffie-Hellman secret key that was generated in advance,
    "DhPublic": The Diffie-Hellman public key that was generated in advance,
    "PrivateKey": The private key of the account that you are going to use to sign transactions
  },
  "CommitChain": {
    "ChainURL": The commit chain URL,
    "ChainWSUrl": The commit chain WS Url,
    "CommitChainPLStorageContract": The PLStorage contract address,
    "ParticipantStorageContract": The ParticipantStorageContract address,
    "AtomicTeleportContract": The AtomicTeleportContract address generated earlier( same for all relayers ),
    "EndpointAddress": The MessageExecutorAddress address generated earlier( same for all relayers ),
    "ChainId": The chainId of the CC,
    "StartingBlock": The block from where to relayer will start to process transactions,
    "PrivateKey": The private key of the account for signing CC tx
  }
}
The database must be different of the Private Ledger
After completing the container´s default configuration and once all the fields have been filled, this JSON file must be mounted at /app/var/config.json
Next, we'll create this config.json at ~/rayls/var/config.json in the local machine.
Run the Relayer
Once all fields in the Relayer has been loaded, we need to run the container mapping the directory ~/rayls/var/config.json inside the container.
sudo docker run -v ~/rayls/var:/app/var registry.parfin.io/rayls-relayer:v1.7.0
Extras
Run container in background
To run the container in background, add the -dflag. Example:
sudo docker run -v ~/rayls/var:/app/var -d registry.parfin.io/rayls-relayer:v1.7.0
The Rayls Private Ledger structure in the container
The next step is to create a folder structure in the container to organise the files and make possible to customise the configuration files and scripts over a volume mapping, and to have the data visible for the customers.
The below the folder structure inside the container.
├─/app
│  ├─ scripts
│ └ var- /app → where we store the binaries
- /app/scripts → where we hosted the script that is the EntryPoint of the container (start.sh)
- /app/var → where we save the configuration file